Mastering the Art of Gluten-Free Zucchini Bread
Most zucchini bread ends up dry or soggy, missing that perfect moistness you crave. You’ve tried recipes that fail to balance moisture and texture, leaving you frustrated. This zucchini bread recipe shows you how to get it just right, with tasty add-ins, gluten-free options, and smart storage tips that keep your bread fresh and flavorful every time. For more inspiration and detailed guidance, check out this gluten-free zucchini bread recipe.
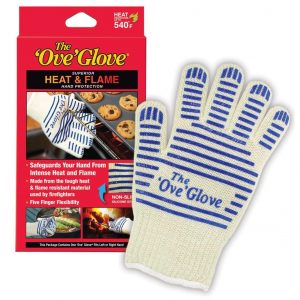
Never burn your hands again while cooking!

Perfecting Moist Zucchini Bread
Creating the perfect zucchini bread is an art. To begin, choosing the right zucchini is crucial. Let’s explore how to make your bread moist and flavorful.
Selecting the Right Zucchini
Freshness is Key: Start with fresh zucchini. Look for ones that are firm and medium-sized. Smaller zucchinis tend to be sweeter and less watery, making them ideal for baking.
-
Peeling: Leave the skin on for added color and nutrients.
-
Grating: Use a coarse grater to maintain texture.
To prevent watery bread, gently squeeze out excess moisture after grating. This simple step ensures your bread remains perfectly moist, not soggy. For more tips on selecting the right zucchini, visit this zucchini bread tips page.
Balancing Moisture and Flavor
Creating a harmonious blend of moisture and flavor in zucchini bread requires the right technique. Here’s how:
Oil or Applesauce: Use oil for a traditional moist crumb, or swap it with applesauce for a lighter option. Both work wonders in maintaining moisture.
Sweetness Balance: Adjust sugar levels based on your add-ins. Chocolate chips or ripe bananas can enhance sweetness naturally.
-
Spices: A teaspoon of cinnamon or nutmeg can elevate flavor without overpowering the zucchini.
Experiment with these elements until you find your perfect mix. Remember, the key is balancing the flavor without losing moisture.
Gluten-Free Zucchini Bread Options
For those seeking gluten-free options, it’s easier than you think to make delicious zucchini bread that everyone can enjoy. Let’s dive into the specifics of gluten-free baking.
Choosing Gluten-Free Flours
Selecting the right flour is crucial for gluten-free baking. The texture and taste of your bread depend on it.
Almond or Coconut Flour: These flours are popular choices. They add a rich flavor and moist texture.
-
Mix and Match: Combine different flours for better texture. A blend of almond and coconut flour offers a nice balance.
Remember, gluten-free flours can vary, so adjust liquids as needed. For a trusted recipe, check out this gluten-free zucchini bread guide.
Flavorful Gluten-Free Add-Ins
Add-ins bring your gluten-free zucchini bread to life. Here are some favorites:
Nuts and Seeds: Walnuts or sunflower seeds add crunch and depth.
-
Dried Fruits: Raisins or cranberries for a sweet, tart contrast.
Experiment with these add-ins to find your favorite combination. They provide an opportunity to customize your bread while keeping it deliciously moist.
Expert Storage and Freezing Tips
Keeping your zucchini bread fresh requires proper storage techniques. These methods ensure that each slice remains flavorful and moist.
How to Store Zucchini Bread
Storing zucchini bread correctly is key to maintaining its quality.
Air-Tight Containers: Store in an air-tight container to retain moisture.
-
Room Temperature: Bread stays fresh for up to three days outside the fridge.
If you plan to keep it longer, consider freezing.
Preventing Sogginess in Storage
Avoiding sogginess is essential for enjoying your bread later. Here’s how to store it effectively:
Wrap in Parchment Paper: Before sealing in a container, wrap slices individually in parchment paper.
-
Freezing: Freeze wrapped slices in a freezer bag. They last up to three months.
These tips ensure each slice tastes as fresh as the day it was baked. For further insights, explore this paleo zucchini bread recipe.
By following these steps, you’ll master the art of baking moist and flavorful zucchini bread. Whether you prefer classic or gluten-free, these tips guarantee delicious results every time.
Never burn your hands again while cooking!
The Science Behind Thickness and Layering in the Best Cooking Gloves
The Science Behind Thickness and Layering in the Best Cooking Gloves Most cooking gloves promise heat resistance, but only a few truly deliver when you’re pulling something hot from the oven. The secret lies in thickness and layering, along with the right cooking gloves materials and grip technology in gloves. [...]
The Ultimate Guide to Heat Protection
Grilling Tips from the Pros: The Ultimate Guide to Heat Protection Handling blazing grates and fiery smokers without singeing your skin takes more than luck—it demands smart heat protection. Professional pitmasters have nailed fire handling techniques that keep their hands safe while working close to intense heat. In this guide, [...]
Balancing Heavy Roasting Pans Without Breaking a Sweat
Safe Lifting Techniques for Turkey: Balancing Heavy Roasting Pans Without Breaking a Sweat Taking a hot, heavy turkey out of the oven can feel like a risky balancing act. If you’re wondering how to remove turkey from oven without spilling grease or dropping your hard work, you’re not alone. These [...]
Why Loose Sleeves Are a Recipe for Disaster
Stay Safe in the Kitchen: Why Loose Sleeves Are a Recipe for Disaster Loose sleeves in the kitchen are not just a fashion statement—they’re a hidden danger waiting to happen. When you’re busy cooking, flowing fabric can catch fire or get tangled in equipment, leading to serious accidents. This post [...]
Essential Safety Tips for Home Chefs
From Burn Risks to Cooking Bliss: Essential Safety Tips for Home Chefs Touching a metal handle heated to 400°F for just one second can cause a sudden, painful burn that leaves a mark far longer than the moment itself. Many home cooks underestimate how quickly these burns happen and how [...]
What You Need to Know for Safe Outdoor Cooking
Grill Flare-Ups: What You Need to Know for Safe Outdoor Cooking Grill flare-ups catch most home cooks off guard, turning a fun outdoor cookout into a risky situation fast. You might think a quick flare-up is just part of grilling, but grease fires and propane flare-ups can quickly get out [...]