
Mastering Pizza Stone Removal: Prevent Burns with These Easy Steps
Removing a hot pizza stone can feel like walking a tightrope—you want your pizza perfect, but one wrong move and you risk a painful burn. Many pizza lovers struggle with how to remove pizza stone safely without fumbling or cracking it. This guide covers simple, practical steps using heat-resistant gloves and a sturdy pizza peel to keep your hands safe and the stone intact every time. For more tips on handling pizza stones, check out this helpful guide.

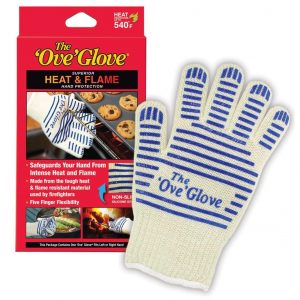
Order the Ove Glove today and get FREE shipping!
Understanding Pizza Stone Safety
Grasping the basics of pizza stone safety is crucial. It’s not just about avoiding burns; it’s about ensuring your pizza stone lasts through many delicious meals. Let’s dive into some essential tools and tips to keep you safe.
Importance of Heat-Resistant Gloves
When handling a hot pizza stone, your hands’ safety should be a priority. Heat-resistant gloves are your first line of defense. These gloves can withstand high temperatures, offering you protection against burns. Imagine pulling out a piping hot pizza stone without the fear of singeing your skin. That’s what these gloves offer. They allow you to focus on the task at hand: creating the perfect pizza. For more insights, see this discussion on glove safety.
Selecting the Right Pizza Peel
A sturdy pizza peel is more than just a tool—it’s a game-changer. It prevents the dreaded fumble that often results in burnt crusts or worse, a cracked stone. Look for a peel with a long handle to keep your hands away from the heat. A wood or metal blade with a slight taper can help you slide it under the pizza smoothly. The right peel makes the transfer process seamless, so you can serve your pizza with a smile.
Ensuring Proper Support
Supporting your pizza stone correctly minimizes the risk of damage. A stone that’s not properly supported can crack, ruining both your meal and your mood. Always place the stone on a stable surface before attempting to move it. This step might seem simple, but it’s critical for maintaining your stone’s integrity.
Precautionary Measures Before Removal
Before you even think about removing your pizza stone, it’s important to take a few precautionary steps. These actions will set you up for a smooth removal process and preserve your stone’s longevity.
Allowing the Stone to Cool
Patience is key here. Allowing your stone to cool gradually prevents thermal shock, which can cause cracking. Here’s the key insight: leave it in the oven with the door slightly open for about 30 minutes. This cooling method is gentle and effective, ensuring your stone stays intact.
Preventing Stone Cracking
Cracking is a common worry for pizza stone users. To avoid this, never place a hot stone on a cold surface. Instead, let it rest on the oven rack until it’s safe to handle. Remember, rushing this process can lead to irreversible damage.
Safe Cooling Techniques
Safe cooling is all about maintaining a consistent temperature. One technique is to turn off the oven and let the stone cool inside gradually. This method not only protects the stone but also conserves energy. Most people think leaving the oven door open wastes heat, but it’s actually a clever way to control the cooling rate.
Protect your hands while cooking with the Ove Glove
Step-by-Step Pizza Stone Removal
With the groundwork laid, you’re ready for the removal process. Following these steps will ensure you handle your stone with confidence and care.
Preparing Your Tools
Preparation is your best friend. Gather all necessary tools before you start: heat-resistant gloves, a sturdy pizza peel, and a stable surface to place the stone on. Having everything within reach makes the process smoother and safer.
Using the Oven Glove Safely
Slip on your oven glove before reaching into the oven. This essential step protects your hands from extreme heat. Make sure the glove fits snugly to maintain a firm grip on the stone. Proper fitting gloves enhance your confidence and safety while handling hot items.
Removing with Confidence
Now, it’s time to act. Slide the pizza peel under the stone slowly to ensure it’s balanced. Carefully lift it out, keeping the peel level to prevent any mishaps. Removing with confidence is all about a steady hand and calm demeanor. By following these steps, you’re already ahead of the game.
Post-Use Care for Your Pizza Stone
After the pizza party ends, turn your attention to caring for your stone. Proper maintenance extends its life and keeps it performing at its best.
Effective Cleaning Tips
Cleaning a pizza stone can seem daunting, but it’s straightforward. Avoid using soap; instead, scrape off residue with a stone brush after it cools. This method preserves the stone’s surface. For an in-depth cleaning guide, visit this resource.
Proper Storage Solutions
Storing your stone correctly is as important as cleaning it. Keep it in a dry place, away from moisture that can cause it to crack. A simple shelf or cupboard will suffice. Proper storage ensures your stone is ready for its next use.
Maintaining Stone Longevity
To maintain your stone’s longevity, avoid drastic temperature changes. Preheat it with the oven, and never place it under running water while it’s hot. By following these tips, your stone will remain a reliable tool in your kitchen arsenal.
Common Mistakes to Avoid
Even seasoned pizza makers can fall into common traps. Here’s how to sidestep these pitfalls and preserve your cooking experience.
Handling Errors
One big mistake is handling the stone while it’s still too hot. This can lead to burns or dropped stones. Always wait until it’s cool to the touch before moving.
Misusing the Pizza Peel
Using the peel incorrectly can ruin your pizza’s presentation. Slide it gently under the dough to avoid tearing. A little flour or cornmeal on the peel can prevent sticking.
Ignoring Safety Tips
Ignoring safety tips is a surefire way to shorten your stone’s life. Follow the steps outlined here to protect both yourself and your pizza stone. The longer you wait to implement these tips, the more you’re risking unnecessary damage and stress.
By mastering these steps, you’ll not only protect your hands and your stone but also ensure every pizza night is a success. Enjoy the confidence that comes with knowing you’re handling your kitchen tools safely and effectively.


All major credit cards accepted
Free Shipping – Order – Track Order – Contact Us
Elevate Your Gifting with Today’s Special Free Shipping
Gifts for Cooks: Elevate Your Gifting with Today's Special Free Shipping Gift shopping for the culinary enthusiast in your life has never been easier, especially with today's special offer of free shipping. Whether you're shopping for a seasoned chef or a budding home cook, finding kitchen gifts that match their [...]
How the Ove Glove Stands Up to High Heat and Repeated Use
Heat-Resistant Gloves: How the Ove Glove Stands Up to High Heat and Repeated Use When it comes to choosing the perfect heat-resistant gloves for your kitchen, durability and performance are key. The Ove Glove stands out as a top choice for home cooks and kitchen enthusiasts, boasting a tough construction [...]
The Ove Glove’s Textured Grip Advantage
Master Kitchen Safety: The Ove Glove's Textured Grip Advantage Mastering kitchen safety is essential for any home cook, and the Ove Glove offers a unique solution with its textured grip advantage. This essential cooking accessory is designed to enhance your confidence when handling hot dishes, ensuring you never drop a [...]
How the Ove Glove is Changing the Game in Heat Protection
Non-Bulky Kitchen Tools: How the Ove Glove is Changing the Game in Heat Protection The kitchen is the heart of the home, and for many, it's a place where practicality meets creativity. For home cooks and kitchen enthusiasts seeking non-bulky kitchen tools, the Ove Glove offers a lightweight solution that [...]
How the Ove Glove Transforms Kitchen Safety for Home Cooks and Aspiring Chefs
From the Pros: How the Ove Glove Transforms Kitchen Safety for Home Cooks and Aspiring Chefs When it comes to kitchen safety, the Ove Glove is a game-changer that has captured the hearts of both seasoned chefs and budding home cooks alike. This heat-resistant glove isn't just another kitchen accessory; [...]
Why the Ove Glove is Your Ultimate Kitchen Companion
Injury-Free Cooking Starts Here: Why the Ove Glove is Your Ultimate Kitchen Companion In the bustling world of home cooking, safety is paramount, and the Ove Glove is here to make your kitchen a safer space. Many home cooks experience the frustration of burns and injuries, but with the right [...]